


Installing ceiling fans is a fantastic way to enhance the comfort and style of your home in Wilmington, DE. Not only do they offer a cost-effective way to cool down your living spaces, but they also add an element of design that can complement any room’s aesthetic. Whether you’re in New Castle, DE, looking to update your living room or in Newark, DE, aiming to add a touch of elegance to your bedroom, the process of installing ceiling fans is straightforward and rewarding.
Before diving into the installation process, it’s essential to gather the right tools and understand the steps involved. From screwdrivers to a ladder, having the necessary equipment on hand will make the installation smoother and safer. Safety should always be a top priority, especially when working with electrical components. Ensuring the power is off before beginning is a crucial step in avoiding any accidents.
For residents in Wilmington, DE, and its surrounding areas, installing ceiling fans can also be a way to reduce energy costs. By circulating air more efficiently than air conditioning units, ceiling fans allow you to raise your thermostat setting without compromising on comfort. This not only leads to lower energy bills but also contributes to a more environmentally friendly home.
Finally, while the task of installing ceiling fans may seem daunting at first, it’s a highly achievable project for those willing to put in the time and effort. With a bit of patience and attention to detail, you can transform the look and feel of your rooms. Whether you’re a seasoned DIY enthusiast or a first-timer, the sense of accomplishment that comes with completing this project is immensely satisfying.
Tools and Materials Needed for Installing Ceiling Fans
Before starting the process of installing ceiling fans, it’s crucial to have all the necessary tools and materials ready. A sturdy ladder, screwdrivers, a wire stripper, and a voltage tester are among the essentials. You’ll also need the ceiling fan kit, which typically includes all mounting hardware. Ensuring you have these tools within reach can streamline the installation process, making it more efficient and less time-consuming.
Safety equipment is equally important to protect yourself during installation. Safety goggles and gloves can prevent injuries from accidental slips or electrical components. It’s also wise to have a friend or family member assist you, especially when it’s time to lift and secure the fan. This not only makes the process safer but also more enjoyable, turning it into a shared project.
For residents in New Castle, DE, and Newark, DE, preparing the workspace is a step that shouldn’t be overlooked. Clearing the area under where the fan will be installed ensures there’s enough room to work safely. It also protects your furniture and flooring from accidental drops or spills. Once the space is prepared, turning off the power at the circuit breaker is essential to prevent electrical shocks.
Lastly, it’s important to carefully read the manufacturer’s instructions included with the ceiling fan. Each model may have specific requirements or steps that are crucial for a successful installation. By following these guidelines closely, you can ensure that your ceiling fan is installed correctly and safely. With the right preparation and attention to detail, installing ceiling fans becomes a straightforward task that significantly enhances the comfort and style of your home.
Preparing the Installation Site
Once you’ve gathered all the necessary tools and materials for installing ceiling fans, the next step is preparing the installation site. This involves selecting the right location in your Wilmington, DE, home where the fan will be most effective. Ideally, it should be the center of the room to ensure an even distribution of air. Ensure the chosen spot can support the weight of the fan, which might require reinforcing the ceiling joist.
Before proceeding, it’s critical to measure the distance from the ceiling to the floor in your New Castle, DE, home. The fan blades should be at least 7 feet above the floor to prevent accidents and ensure optimal airflow. If your ceilings are high, you might need a downrod to position the fan correctly. This adjustment ensures it’s both safe and functional, enhancing the room’s comfort and style.
Next, remove any existing light fixture or fan in the installation spot, carefully following safety protocols. First, ensure the power is completely turned off at the circuit breaker to avoid electrical shocks. Then, gently detach the fixture from the ceiling, keeping track of all screws and wiring. Residents of Newark, DE, should remember to wear safety goggles and gloves during this step to protect against dust and debris.
Finally, inspect the electrical box to confirm it’s suitable for a ceiling fan installation. It must be securely attached to a beam or a support bracket designed for the extra weight of a ceiling fan. If the existing box isn’t adequate, replace it with one that is rated for ceiling fans. This precaution prevents future problems, ensuring your fan remains safely mounted and operational for years to come.
Step-by-Step Guide to Installing Ceiling Fans
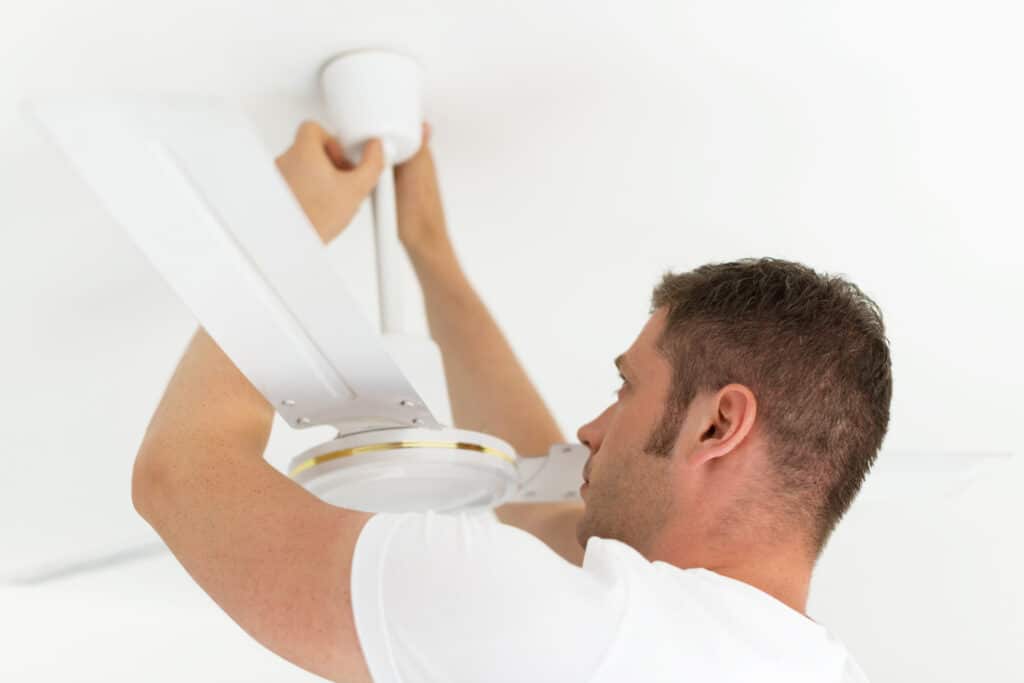
After ensuring the electrical box is suitable for installing ceiling fans, the next step is to assemble the fan according to the manufacturer’s instructions. This usually involves attaching the blades to the motor housing before hanging the fan. It’s a good idea to do this on the ground in Wilmington, DE, which makes the process easier and safer. Remember, keeping all components secure during assembly prevents issues after installation.
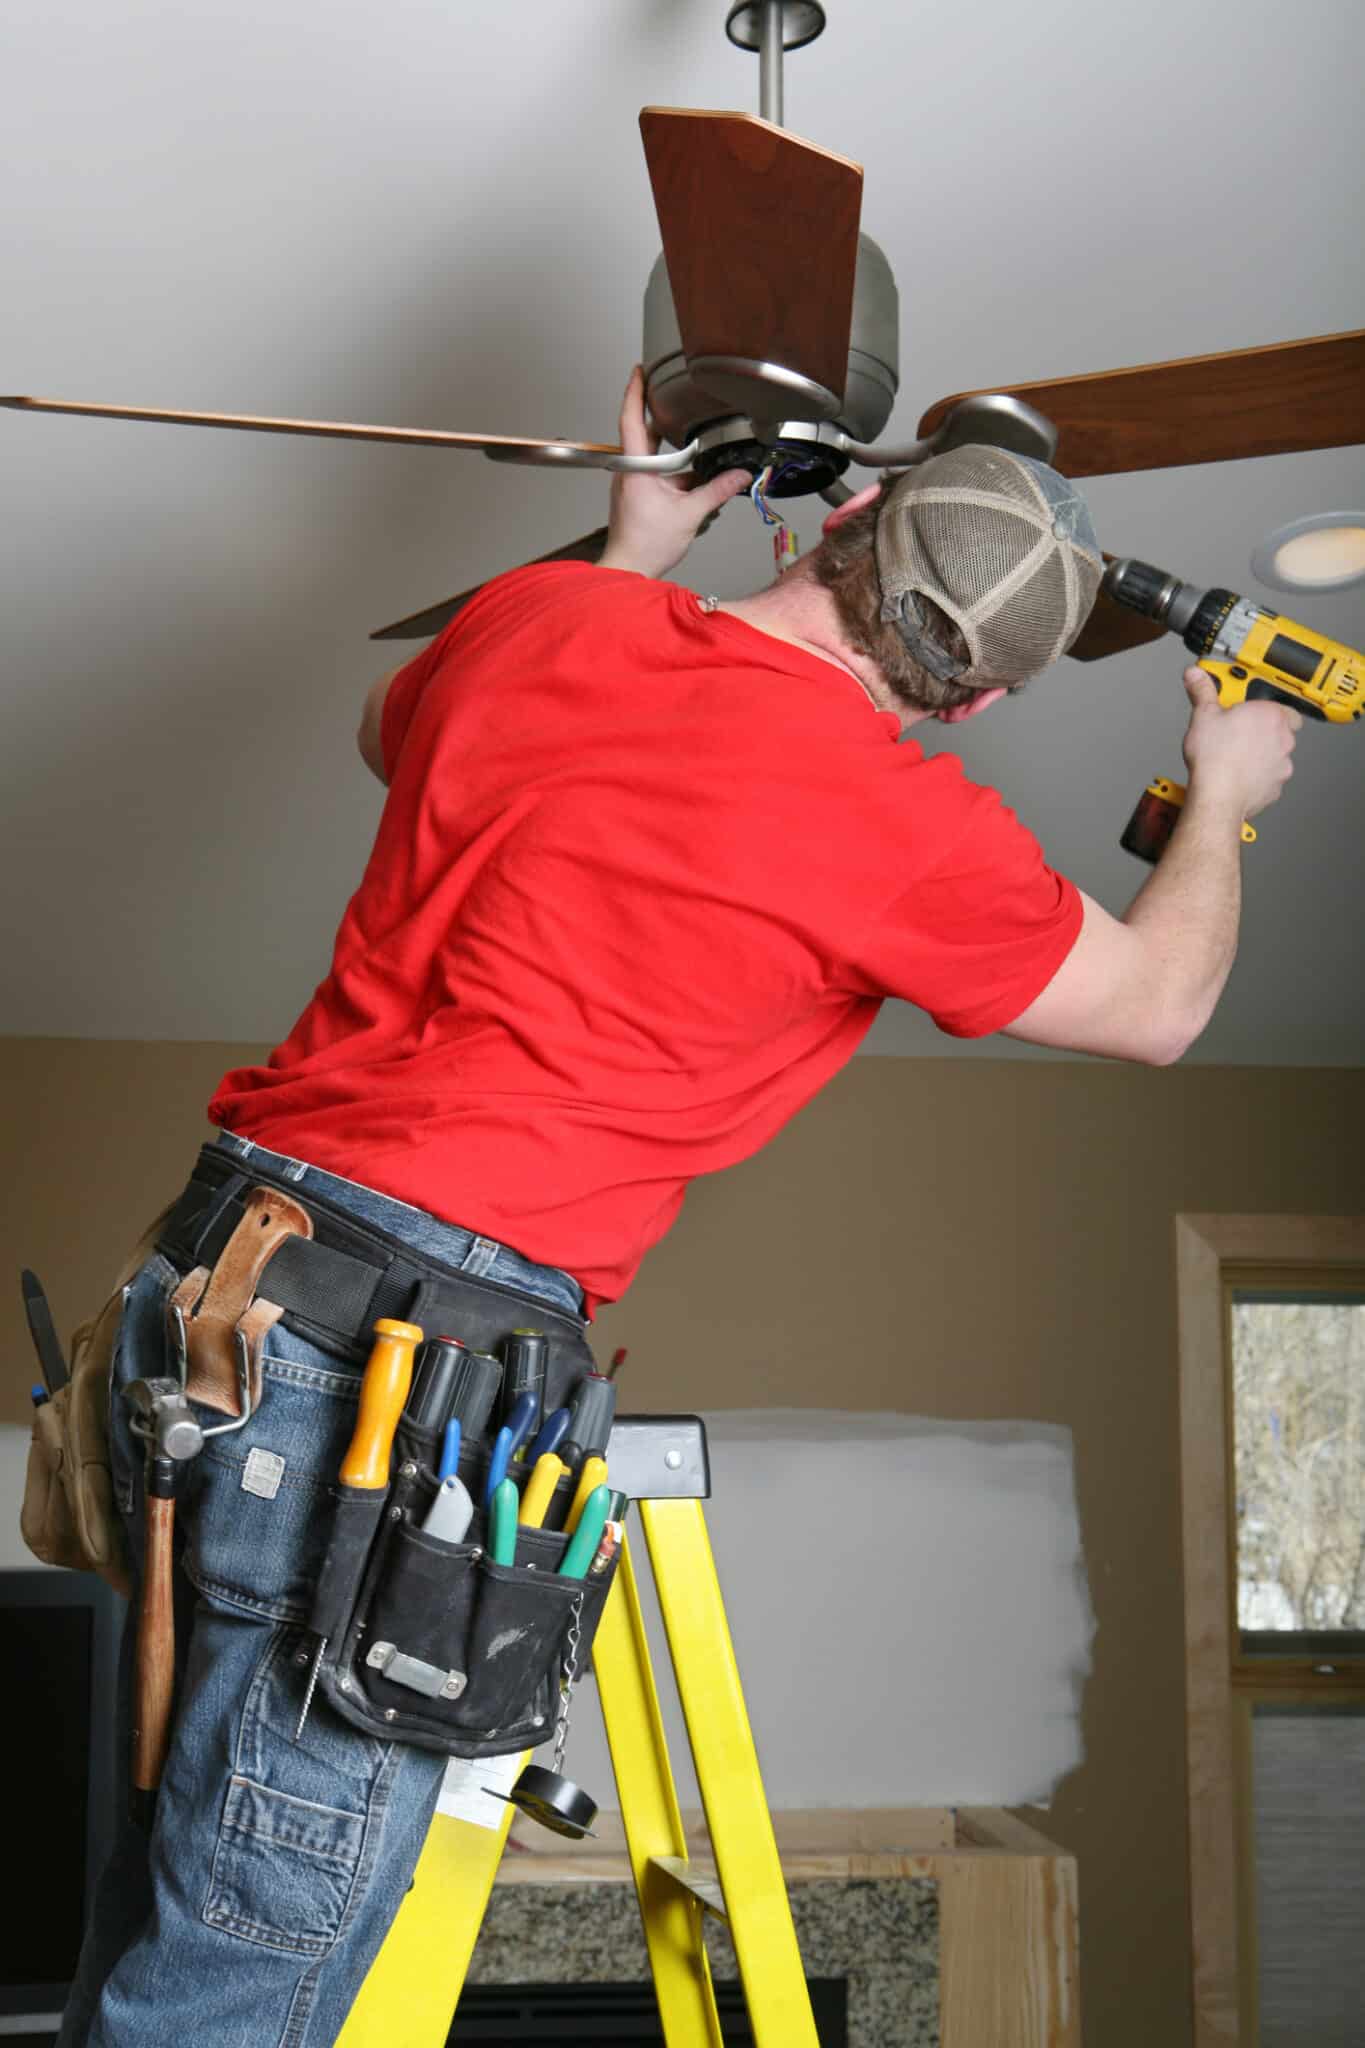
Once the fan is assembled, it’s time to mount it to the ceiling. Begin by attaching the mounting bracket to the electrical box, ensuring it’s tight and secure. This is crucial for the stability of the ceiling fan, especially in homes in New Castle, DE, where fans might operate for extended periods. Next, carefully lift the fan to the bracket and connect the wiring, following the color-coded guide from the manufacturer.
After connecting the wires, it’s important to secure the fan to the ceiling firmly. In Newark, DE, this means using the provided screws to attach the fan’s base to the mounting bracket. Once in place, double-check all connections to ensure they’re tight and the fan is securely mounted. This step prevents wobbling and potential accidents, ensuring your fan operates smoothly.
Finally, the last step in installing ceiling fans is to attach any light fixtures or covers that come with your fan. This not only completes the aesthetic look of the fan but also ensures that all electrical components are safely covered. Turn the power back on at the circuit breaker and test the fan to make sure it operates correctly. Congratulations, you’ve successfully enhanced your home’s comfort and style with a new ceiling fan.

Wiring Your Ceiling Fan Safely
Wiring your ceiling fan safely is a crucial step in the installation process, ensuring everything runs smoothly and securely. First, make sure the power is still off at the circuit breaker to avoid any electrical hazards. Then, in New Castle, DE, carefully match the ceiling fan’s wires with the house wires, usually, this involves connecting the white wires together, the black or colored wires together, and attaching the green or bare wire to the ground screw on the mounting bracket. These steps are essential for a safe electrical connection and the fan’s proper operation.
Next, use wire nuts to secure the connections between the fan wires and the house wires. Twist them until they’re tight, ensuring there are no loose strands that could cause a short circuit. In Newark, DE, it’s also a good idea to wrap electrical tape around each wire nut, adding an extra layer of security. This practice helps prevent the wire nuts from loosening over time due to the fan’s vibration.
After securing the wire connections, gently tuck them into the electrical box to keep them organized and out of the way. This step is crucial to avoid any pinching or damage to the wires when you’re attaching the fan to the ceiling. Carefully positioning the wires ensures they don’t interfere with the fan’s operation or pose a safety risk, keeping your home in Wilmington, DE, safe and comfortable.
Finally, once all the wires are connected and tucked away, proceed to the final steps of installing ceiling fans as outlined in the previous sections. With the wiring securely in place, you can confidently complete the installation, knowing your ceiling fan is safely connected. This not only brings a sense of achievement but also enhances the comfort and style of your home, making it a rewarding project for any DIY enthusiast in Wilmington, DE.
Attaching the Fan Blades and Light Fixtures
After wiring your ceiling fan, the next step is attaching the fan blades, which is crucial for the fan’s functionality. Start by aligning the blades with the motor housing, ensuring they fit snugly. In New Castle, DE, it’s important to secure each blade with the provided screws, making sure they’re tight to prevent any wobbling. This careful attention to detail ensures your ceiling fan will run smoothly and efficiently.
Following the blades, installing any light fixtures that come with your ceiling fan is the next task. First, connect the light fixture to the fan’s motor housing, paying close attention to the wiring instructions. Residents of Newark, DE, should remember to match the wires correctly to ensure the light operates safely. Once connected, secure the fixture with screws or the provided mounting hardware, enhancing your room’s aesthetic and functionality.
Testing the fan and light fixtures is essential before considering the job complete. Turn the power back on at the circuit breaker and use the fan’s switch to test its operation. The moment when the blades start spinning smoothly and the light turns on is rewarding, marking the success of your installation project in Wilmington, DE. This step not only verifies the functionality but also ensures the safety of your newly installed ceiling fan.
Finally, take a moment to admire your work and enjoy the improved comfort and style of your room. Installing ceiling fans is a project that not only enhances air circulation but also adds a decorative touch. With the fan blades and light fixtures securely attached, your living space in Wilmington, DE, is now more inviting and comfortable. This DIY project is a perfect example of how a little effort can make a significant difference in your home’s ambiance.
Final Checks and Testing Your New Ceiling Fan
After installing ceiling fans, conducting final checks is crucial to ensure everything is correctly set up. In New Castle, DE, begin by inspecting the fan’s alignment and balance. Make sure the blades are evenly spaced and securely fastened, as any imbalance could cause the fan to wobble during operation. This step is vital for both the fan’s efficiency and the safety of your home.
Next, review all the connections one last time, focusing on the wiring. In Newark, DE, it’s essential to confirm that all wire nuts are tight and that the wires are neatly tucked away. This prevents any electrical hazards and ensures the fan operates smoothly. Properly connected and secured wires are the backbone of a safely installed ceiling fan, guaranteeing its long-term performance.
Now, it’s time to test the ceiling fan. Turn the power back on at the circuit breaker and use the wall switch or remote to start the fan. Observe how it operates, listening for any unusual noises and watching for stable movement. This test run is critical to catch any issues before you consider the installation complete, ensuring your fan adds comfort without any complications.
Finally, with the fan successfully installed and tested, you can enjoy the fruits of your labor. The breeze generated by your new ceiling fan will not only keep your home in Wilmington, DE, comfortable but also add a touch of elegance to the room. Installing ceiling fans is a rewarding project that enhances both the functionality and style of your living space, making it a worthwhile addition to any home.
Safety Tips When Installing Ceiling Fans
When installing ceiling fans, safety is paramount. Before you begin, make sure the power is turned off at the main circuit to prevent electrical shock. This is a crucial step whether you’re working in New Castle, DE, or anywhere else, as it ensures a safe environment for you to start the installation. Always double-check with a voltage tester to confirm the power is indeed off.
Next, use a sturdy ladder that can support your weight comfortably. It’s important to choose the right ladder height so you’re not overreaching, which could lead to accidents. In Newark, DE, or any other city, having someone to stabilize the ladder while you work adds an extra layer of safety. This buddy system can prevent falls and ensure you have help if an unexpected issue arises.
Wearing protective gear is another essential safety tip. Safety goggles protect your eyes from debris, while gloves can guard against cuts and scrapes when handling the fan’s parts. These precautions might seem small, but they play a significant role in preventing injuries during the installation process. It’s easy to overlook these steps in the eagerness to get the fan up, but they are vital for your protection.
Lastly, carefully read and follow the manufacturer’s instructions for installing ceiling fans. Each model may have unique requirements or steps that are critical for a safe and effective installation. Skipping this step could lead to improper installation, which in turn could cause the fan to malfunction. By taking the time to understand the specific instructions, you ensure a smoother installation process and a safer outcome for your home.
Maintenance Tips for Your Ceiling Fan
After installing ceiling fans in your Wilmington, DE home, regular maintenance ensures they continue to run efficiently. Dust accumulates on fan blades over time, reducing airflow and efficiency. In New Castle, DE, it’s advisable to clean your fan blades every few months with a soft cloth to maintain optimal performance. This simple step can significantly extend the life of your fan and keep it looking as good as new.
Lubricating the fan motor is another crucial aspect of ceiling fan maintenance. Most fans require lubrication once a year to run smoothly. Residents in Newark, DE, can find the specific lubrication requirements in their fan’s manual. Ensuring the motor is properly lubricated prevents noise and wear, contributing to a longer lifespan for your ceiling fan.
Checking the fan’s screws and fittings regularly is also important to prevent wobbling. Over time, the vibration of the fan can loosen screws, leading to instability. Tightening these screws periodically ensures your fan remains secure and operates quietly. This is a quick task that can make a big difference in the fan’s performance and safety.
Lastly, it’s wise to periodically check the ceiling fan’s alignment and balance. An unbalanced fan can wobble, making noise and potentially causing damage. Balancing kits are available for those who notice their fan is off-kilter. By following these maintenance tips, you can ensure your ceiling fan continues to enhance the comfort and style of your home efficiently.
Frequently Asked Questions About Installing Ceiling Fans
What tools are needed for installing ceiling fans?
Before you start installing ceiling fans, gathering the right tools is crucial. You’ll need a screwdriver, wire strippers, and a ladder for easy access. A voltage tester is also essential for safety, ensuring no live wires during installation. Having these tools at hand will make the process smoother and safer.
How do I choose the right ceiling fan?
Choosing the right ceiling fan involves considering room size and style. For larger rooms, opt for fans with longer blades to ensure adequate airflow. Fans with light fixtures add functionality and charm, perfect for spaces needing extra illumination. Always match the fan’s design with your room’s decor to enhance aesthetic appeal.
What safety precautions should I take?
When installing ceiling fans, always turn off the power at the circuit breaker. Use a voltage tester to confirm the wires are not live before starting. Keep your ladder stable to avoid falls. Lastly, wear protective eyewear to shield against any debris or wire clippings.
Can installing ceiling fans reduce energy costs?
Yes, installing ceiling fans can help lower energy costs in your home. By circulating air, they allow you to adjust your thermostat and use less heating and cooling energy. In the summer, fans create a cool breeze that reduces the need for air conditioning. Similarly, in winter, running fans in reverse helps distribute warm air, cutting down on heating requirements.
How long does installing a ceiling fan take?
Installing a ceiling fan typically takes a few hours. Beginners might need a bit more time to get comfortable with the steps. With the right tools and a clear guide, the process is straightforward. Remember, taking your time ensures a safe and successful installation.